As a Surgeon it’s a great idea to have yourself (or your practice/surgery) listed on google maps to help increase your chances of being found when people search on Google for terms such as “orthopaedic surgeon near me”. When a user types a search term of this nature into Google it will automatically load Google Maps and show a list of Surgeons who are located within a certain proximity of the user’s device, and if you’re listed with all your contact details then your chances of being sought after are much higher than if you weren’t listed. It of course also makes you look much more professional and the great thing about it is – it’s free! So without further adieu let’s list the steps required to get yourself listed on Google Maps.
Step 1: Go to ‘Google My Business’
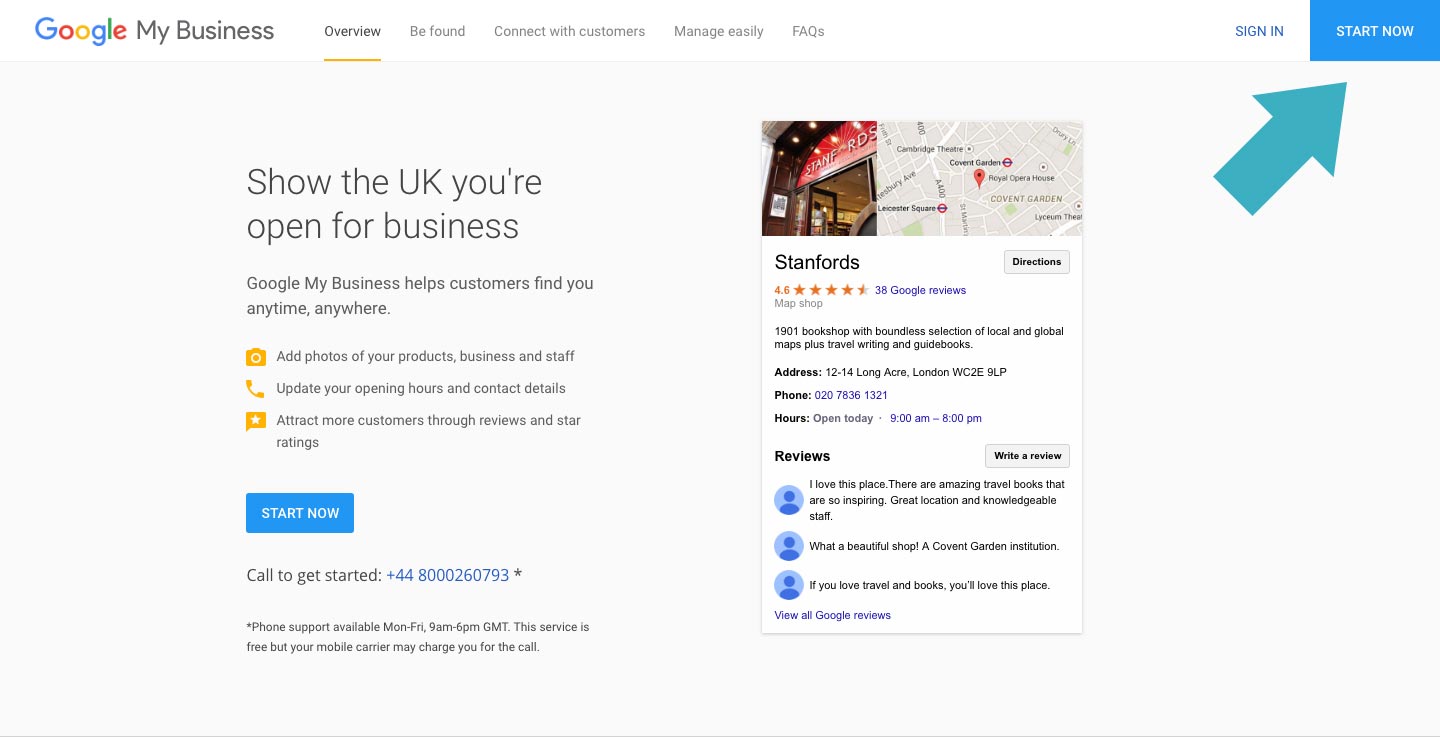
Simply visit this link – https://www.google.co.uk/business/go/ – and you’ll be directed to the ‘Google My Business’ homepage. ‘Once here simply click the ‘Start Now’ button
This is where we are going to add all of your details and get listed onto Google Maps – please don’t worry about this process using the term ‘my business’ – this wording is purely a formailty on Google’s part and adding yourself as a surgeon is still fine.
You’ll then be prompted to login to your Google Account, if you don’t currently have a Google Account then just click ‘Create Account’ and type in your details to easily sign up.

Step 2: Fill in Your Contact Details
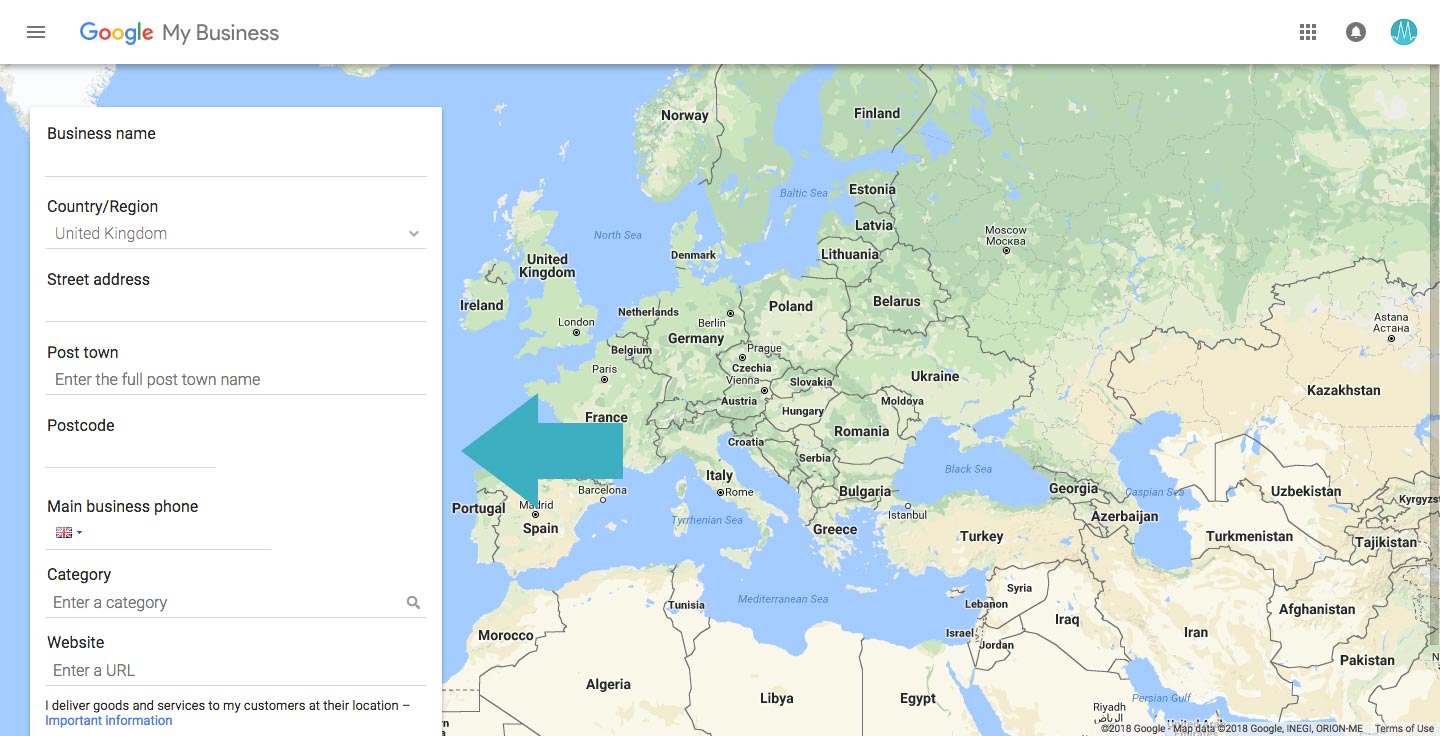
Once you have logged in you’ll then be redirected to a page filled with the background of a large google map and a box on the left where you now need to type in all of your details. There’s nothing too intrusive just your business name, work address, telephone and website (if you have one).
The main things to not here are where it asks for ‘Business Name’ just use your name there with prefix ‘Dr’ and where it lists ‘Category’ be sure to choose your speciality here for example ‘Orthopaedic surgeon’ or if your speciality isn’t listed there is just a simple ‘Surgeon’ option.
Once you have completed all of the information and clicked ‘Continue’ you’ll then be prompted with selecting whether or not ‘I deliver goods and services to my customers at their location’ and whether you offer your services across a certain region. Usually for surgeons it’s a case of only operating from one specific hospital to typically you would choose ‘no’ for the first option and leave the second option blank.

Step 3: Select Verification Code Method
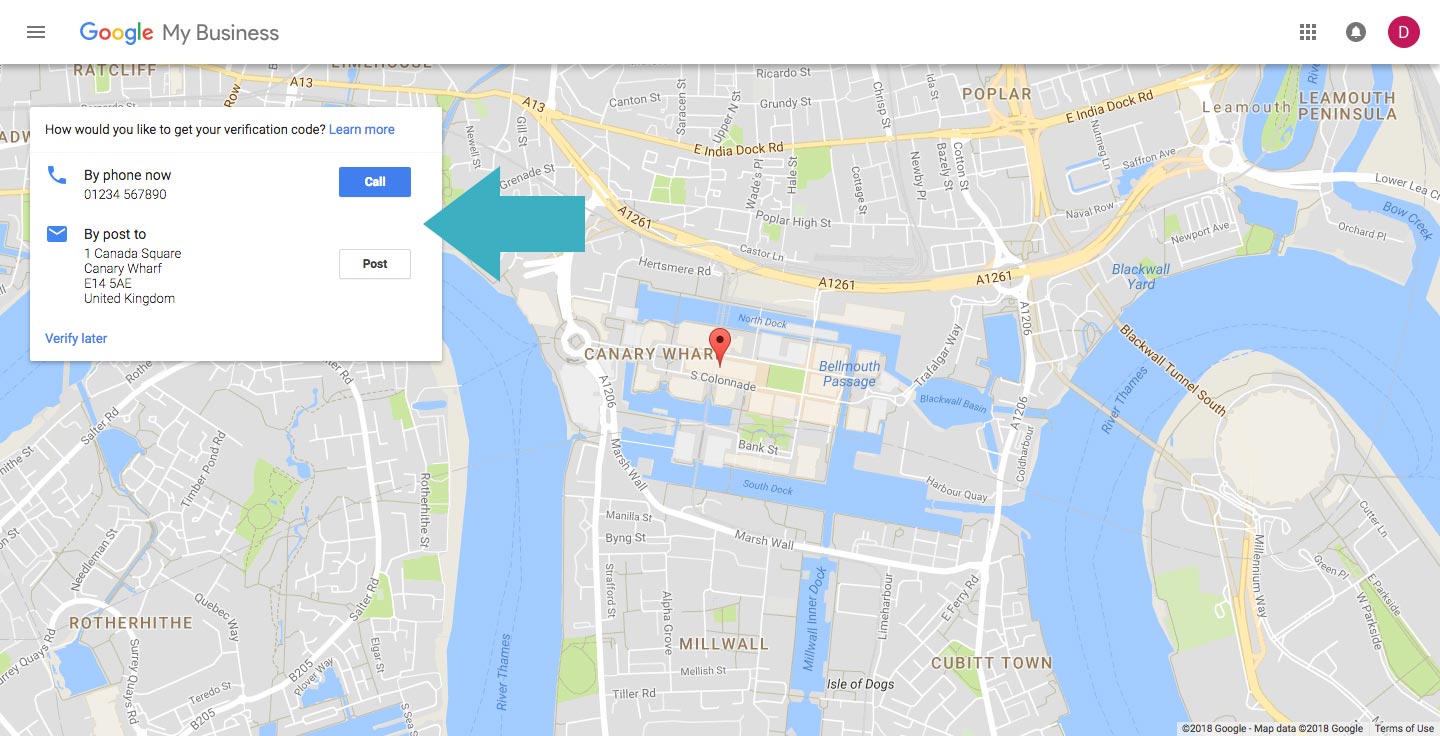
Once all of your details are complete you will be met with a final input box which requires you to choose a method of verification – quite understandably Google will need you to verify the listing is real. Sometimes you will be shown two options for verification, ‘By phone now’ or ‘By post to’. Please note this isn’t always the case and mostly you will only be given the option to verify by post.
By Phone Now
If you have been give the option to verify by phone then please choose this option since it is much easier and verifies your listing immediately. You simply click the blue ‘call’ button, a new screen will appear where you can type in a 5 digit code – an automated voice will call the telephone number you provided previously and recite to you a 5 digit code which you simply need to type into the screen provided.
Once this is done you are now verified and within 24 hours your Google Maps listing will show!
By Post to
If you have only been given the option to verify by post then simply click the ‘Post’ button. You will then be notified that a postcard will automatically be sent to the work address you provided in step 2 – this generally takes 3 days. So now unfortunately you simply need to sit back and wait patiently until this postcard arrives then move onto step 4.

Step 4: Verify your Google Business Listing
This step only applies if you opted for the verification via post method, if you verified over the phone then you’re all done and can skip to Step 5. However if you chose the verification by post option then this is your last step.
Once the postcard arrives (Google call it a postcard but in-fact it actually looks more alike a PAYE payslip where you rip the edges off, but anyway!) you simply need to open it to find the 5 digit verification code. Once you have this simple go to this web address – google.com/verifymybusiness – and type in the 5 digit code provided. Please ensure you are logged in under the same Google Account as the one you used during listing your business otherwise this process won’t work. Once you’ve filled in the 5 digit code and verified the listing you’re all done! Your listing will now start to appear in Google Maps within approximately 24 hours.

Step 5: Input Additional Information
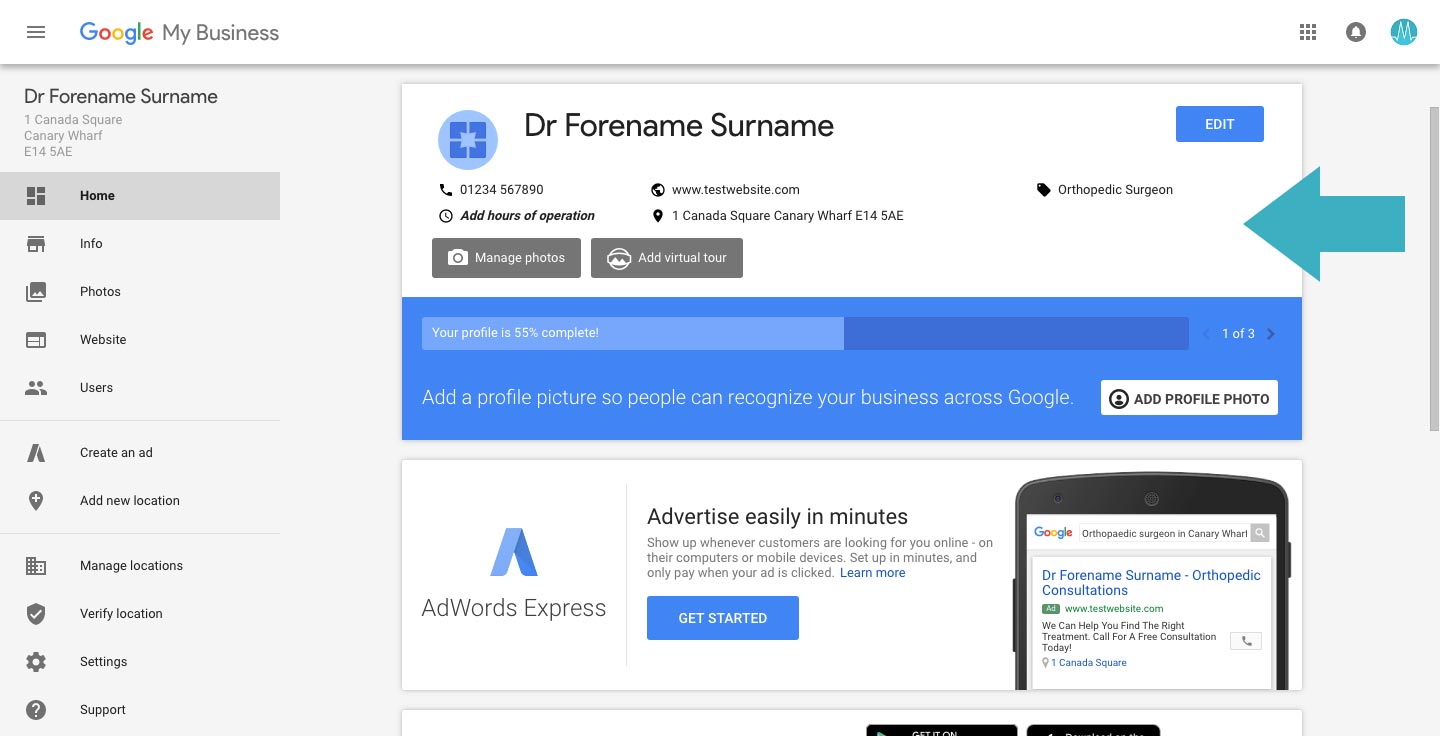
In all honesty this final step is more ‘cosmetic’ than a major requirement – once you have verified your listing you will start to appear on Google Maps, however one last thing you can do is now go to your business listing via this link – https://www.google.co.uk/business/go/ – and signing in via the button on the top right.
Once logged in you’ll see your business listing officially verified but quite ‘blank’ so here is where you can add all the final information to your Google Maps listing to make it stand out, including:
- Profile Picture
- Cover Photo
- Opening Hours
- Personal Bio
- And amend/update any previously input information (telephone number etc)
So if you ever need to add or amend anything this is the place to come.

And that’s it! Once you’ve followed all of the above steps you’ll now be listed on Google Maps. What’s even better is that this listing now appears generally within Google as well so when someone types in your name, all of this information will show in the right hand column of Google – so it’s a great thing to do in order to help people find you with greater ease.